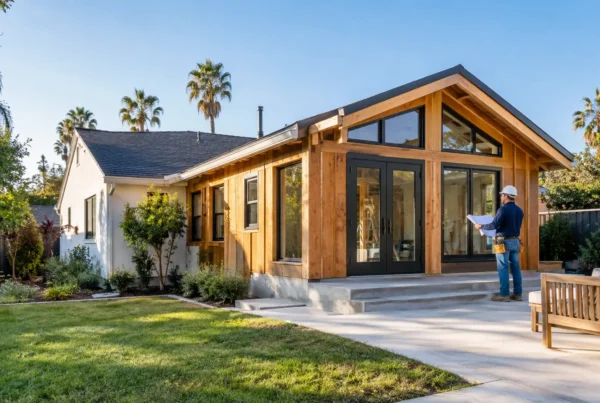

A project can look complete and still be unfinished. A missing warranty, an untested control system, an open permit, or a final invoice that does not match the approved scope can create expensive problems after the crew leaves. A disciplined post construction closeout checklist protects the owner, confirms the work is ready to use, and gives every party a clear record of what was delivered.
For Los Angeles homeowners, investors, business owners, and facility managers, closeout is the point where a construction project becomes a functioning property improvement. It is not paperwork for paperwork’s sake. It is how you verify that the kitchen, ADU, tenant improvement, addition, or commercial build-out was completed safely, according to the agreed scope, and with the information needed to maintain it.
Why Closeout Deserves Its Own Plan
Closeout starts before the last day on site. Waiting until the final walkthrough to gather documents, schedule demonstrations, or identify unfinished work puts unnecessary pressure on everyone. It can delay occupancy, final payment, financing requirements, tenant move-in, or the opening of a business.
The exact requirements depend on the project. A bathroom remodel may have a shorter closeout package than a ground-up commercial project with fire-life-safety systems, HVAC controls, accessibility requirements, and multiple inspections. Still, the core goal remains the same: confirm the work, the records, and the property are ready for turnover.
A dependable contractor coordinates the trades, organizes the final details, and communicates clearly about what remains. Owners should also know what to expect and review before signing off.
Post Construction Closeout Checklist: 10 Essentials
1. Confirm the contracted scope is complete
Start with the signed agreement, approved plans, specifications, and written change orders. Compare them against the completed work room by room or system by system. This prevents a common closeout issue: an item was discussed verbally but was never included in the final approved scope.
Check finishes, fixtures, appliances, doors, hardware, paint, flooring, trim, exterior work, and any agreed site improvements. For commercial work, also verify signage supports, partitions, specialty equipment connections, and tenant-requested features. If an item is incomplete, document it clearly rather than relying on memory.
2. Complete the punch list
A punch list identifies small corrections or incomplete items found near the end of construction. Typical examples include paint touch-ups, adjusted cabinet doors, missing caulk, damaged flooring, loose hardware, or labels that were not installed.
The key is to keep the list specific. Note the location, the concern, the responsible trade, and the expected correction. A useful punch list is not an open-ended wish list for new work outside the contract. If the owner requests a new feature at this stage, it should be handled as a separate change rather than confused with a correction to existing work.
3. Verify final inspections and permit status
Final inspections are among the most important closeout milestones. Depending on the scope, local authorities may inspect structural work, electrical systems, plumbing, mechanical equipment, fire protection, energy-related measures, and accessibility features.
Owners should receive confirmation that required final inspections have passed and that permits are ready to be finalized or closed. In Los Angeles, permit and inspection requirements can vary by property type and scope. An ADU, garage conversion, room addition, commercial renovation, and public-facing facility may each have different approval paths. Do not assume a passed inspection from one trade means the entire permit process is complete.
4. Collect warranties and product information
A strong closeout package includes workmanship warranty information along with manufacturer warranties for installed products. These may cover roofing, windows, appliances, water heaters, HVAC equipment, flooring, cabinets, specialty coatings, and other major components.
Warranty terms often depend on proper registration, maintenance, and installation records. Review who must register the product, the deadline for doing so, and what could void coverage. Keep receipts, model numbers, serial numbers, and photographs of equipment labels in one accessible location.
5. Receive operation and maintenance information
New systems need more than an owner’s manual. The closeout package should explain how to operate and maintain installed equipment, including thermostats, water shutoffs, electrical panels, smart-home controls, irrigation, ventilation, security devices, gates, and commercial building systems.
For a residence, this information helps owners avoid preventable service calls. For a commercial property, it gives facility staff the foundation to maintain operations safely and consistently. When equipment is complex, schedule a walkthrough or training session with the relevant installer before turnover.
6. Test building systems before handover
A final visual inspection is not enough. Systems should be tested under normal operating conditions whenever practical. Open and lock doors and windows. Run plumbing fixtures. Test lights, outlets, GFCI protection, exhaust fans, heating and cooling, appliances, garage doors, and exterior drainage.
Commercial projects may require a broader verification process involving controls, emergency lighting, alarms, access systems, ventilation, and other life-safety or operational equipment. Testing can uncover issues that are invisible during a walkthrough, such as a miswired switch, an unbalanced door, or a control setting that needs adjustment.
7. Review final cleaning and site condition
The project area should be safe, clean, and ready for its intended use. That means removing construction debris, surplus materials, temporary protection, tools, and equipment unless the owner has agreed to retain specific materials for future repairs.
Look beyond the main work area. Confirm driveways, sidewalks, landscaping, common areas, and neighboring access points were protected and restored as required. Construction dust can settle in vents, cabinets, windowsills, and adjacent rooms, so a final cleaning should match the scale of the project.
8. Organize keys, access devices, and records
Turnover should include all physical and digital access items. This can include house keys, mailbox keys, gate remotes, garage remotes, access cards, alarm codes, smart-lock credentials, and equipment passwords.
For security, change temporary codes and confirm that prior users no longer have access. Commercial owners should document who receives each credential and establish a process for managing access after occupancy. This small administrative step is easy to overlook, but it matters immediately after construction ends.
9. Reconcile final costs and lien documentation
Before final payment, review the original contract, approved change orders, allowances, credits, and payment schedule. The final invoice should be understandable and should match the work authorized during the project.
Depending on the project and payment structure, owners may also need lien releases or other documentation confirming that subcontractors and suppliers have been paid for work included in the final payment. This is especially important when multiple trades, specialty materials, or large commercial scopes are involved. Clear documentation protects the owner and supports a clean financial finish.
10. Set the post-turnover communication plan
Even well-built work can need an adjustment after normal use begins. Ask who to contact for warranty questions, how to report an issue, what response time to expect, and which maintenance tasks remain the owner’s responsibility.
For a new home, addition, or remodel, normal seasonal movement and minor settling can lead to small cosmetic adjustments. For commercial facilities, the first weeks of operation often reveal scheduling, comfort, or access needs that were not apparent during construction. A defined communication path keeps those issues organized and addressed promptly.
How Owners Can Make the Final Walkthrough Productive
Schedule the walkthrough when the work is substantially complete and there is enough time to correct legitimate punch-list items before occupancy. Bring the contract scope, approved change orders, and a way to take notes or photos. Move methodically through the property instead of trying to inspect everything at once.
Ask practical questions. Where is the main water shutoff? Which breaker serves the new equipment? How do you clean the flooring? When should filters be changed? What maintenance is required for exterior finishes or drainage? These questions are particularly valuable for first-time homeowners and owners taking over newly renovated commercial space.
It also helps to separate performance concerns from personal preferences. If a door does not latch, that is a correction. If an owner decides after installation that they would prefer a different hardware finish, that may be a change request. Clear distinctions keep closeout fair, efficient, and focused on delivering the agreed work correctly.
A Clean Turnover Protects the Investment
Construction closeout is where quality becomes verifiable. The finished appearance matters, but so do the documents, inspections, system tests, warranties, and clear answers that support the property long after the project is complete.
At RD Fast Construction, closeout is treated as part of the job, not an afterthought. When owners receive an organized handover and know exactly how their new space works, they can move forward with confidence and put their investment to work.